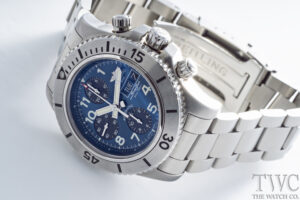
Months ago when I received the Royal Oak Offshore Queen Elizabeth II Diver, a few ideas immediately came to mind. The first was to take the Queen’s brushed titanium buckle and use it on my titanium Rubens Barrichello II Offshore. As I have mentioned in discussing the QEII, that watch would have been better supplied w/ a pink gold buckle. Nonetheless, blasted titanium on the Queen is a better look than brushed, so I was able to pluck the brushed buckle to use on the RBII.
The second idea was to use the Queen’s awesome dark grey croco strap with white stitching on the RBII. It sure looks great on the QEII, but I have been very curious about making the change.
I finally got to it this morning and snapped a few photos of the process for those who might be curious about it. I told myself I would do the change before starting my morning coffees, but being a java junkie, I had a few shots to lift the fog before I began 
If you have heard before that it is difficult to change the strap on a Royal Oak or a Royal Oak Offshore, well, it is really just semantics. I would say that the process is much more involved and requires proper thought along the way, when compared to changing the strap on a simple screw mount like a Panerai, or a springbar attached strap. I’ll point out a few of helpful tricks along the way.
So, here we are with the necessary tools ready to go.
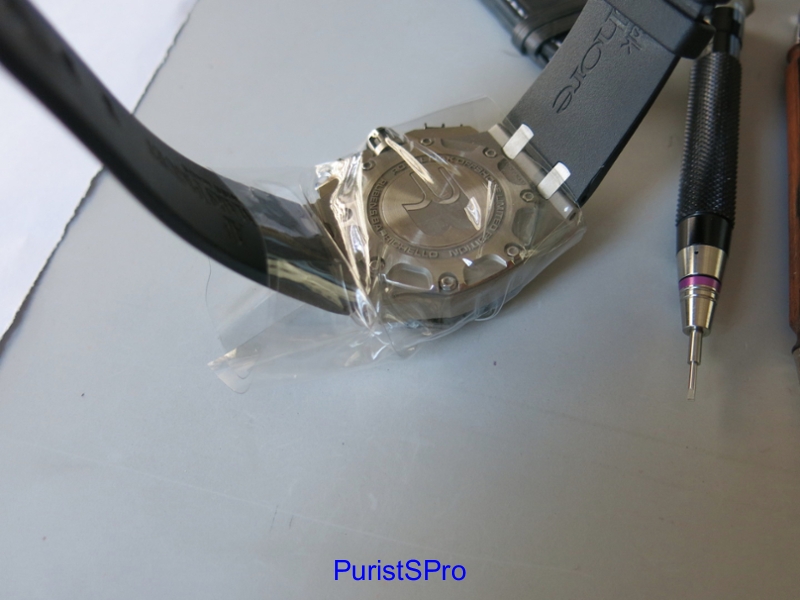
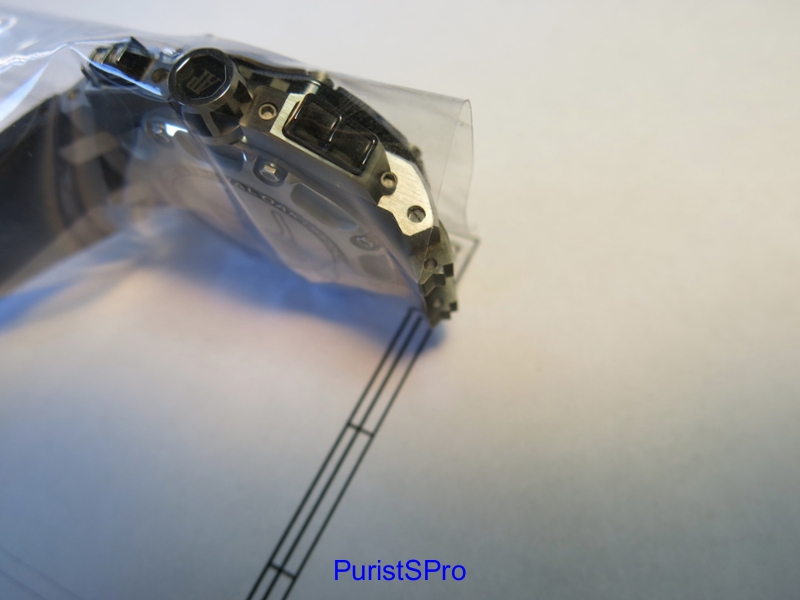
Of primary concern is protecting the rest of the case, bezel, crystal, etc. while working on the watch. I wrap the entire head in plastic, leaving just enough access to get the screwdriver blade to the screws that go through the top of the strap. Make sure you are not wearing any rings or jewelry that might get in the way.
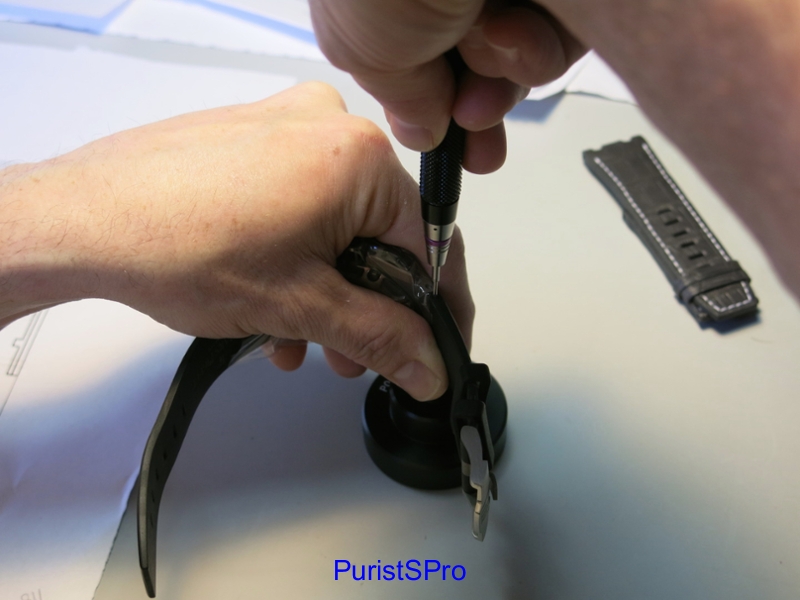
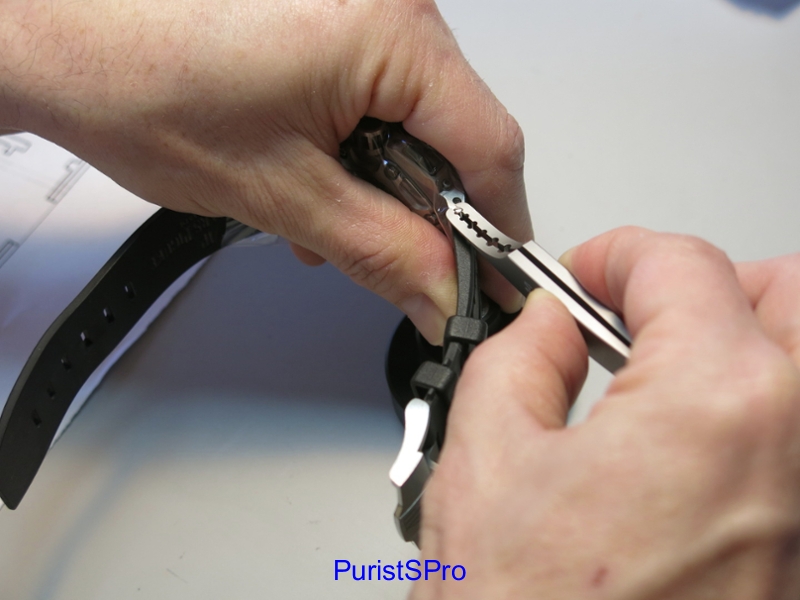
I am a bit fortunate to have purchased an AP factory tool kit many years ago when I had the chance. You certainly do not need AP’s specific tools, but high quality blades are required. The key here is to understand that the strap attaches with a 2 part screw bar that threads together on one end. If you were to set your blade against just one side and try to loosen it, the other side will just spin around. You need to hold one side in place with a block. In the photo below, I have set the fixed blade onto the screw. I then turn the block on the table and make sure it is properly seated (you will see the exposed screw on top turn as you rotate the block).
Next you set your screwdriver down and again, make sure it properly seats into the screw slot. AP screw heads are very small, and hence the importance for a proper size and high quality blade.
This step is where most problems can occur. Nobody wants to slip and let the blade come off the screw and scratch the watch. So when learning how to do this, it is common to be too gingerly with your pressure. You need to do the very opposite. By pushing down firmly, with both blades properly seated, you make sure there is no slippage.
Once the two screws disengage from each other, you will feel a click. Now you can remove one screw.
I use a large paperclip to push the longer screw section out the other side.
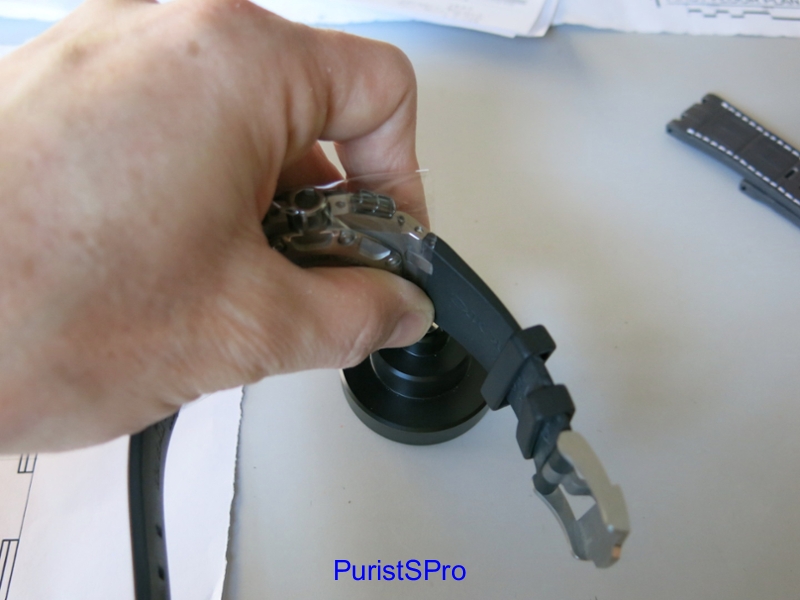
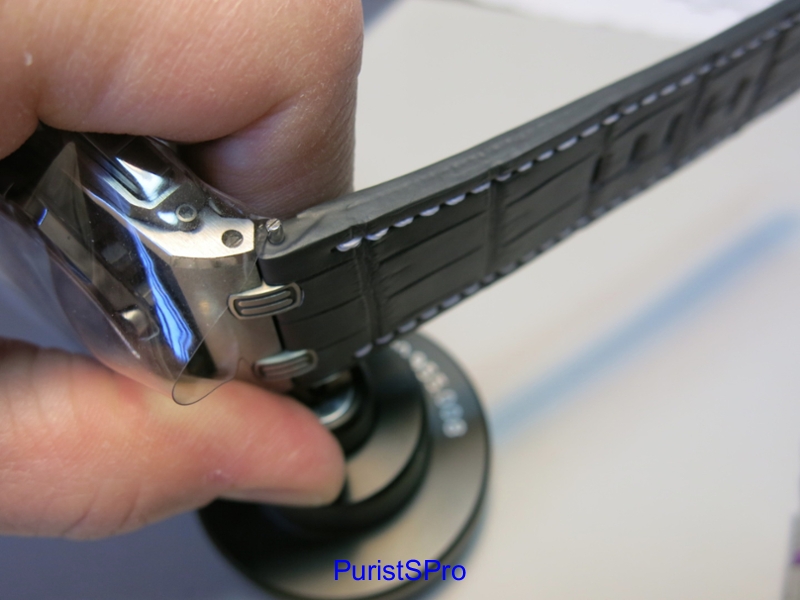
Since I remove the top section first, I like to go ahead and get the buckle on the new strap before I mount it back on the watch. There is no reason to mount it without the buckle and then subject the watch to extra handling as you try and affix it.
A basic springbar holds the buckle in place. Coming off of the old rubber Survivor strap is easy, as the rubber bends out of the way as you push the tool in. Pull back a bit, and hold the pressure on the springbar as you tip the strap up.
I then center the springbar in the new strap. Don’t forget to thread it through the pin as well, and make sure it is facing the correct way. Also, when you attach the buckle to the springbar, make sure the pin is overlapping the outside. I have forgotten this important step before and you realize rather quickly if it is facing the wrong way 😉
Once you have the buckle set, make sure to give it some good tugs on each side. The springbar ends needs to push into place and fully lock into the buckle’s recesses.
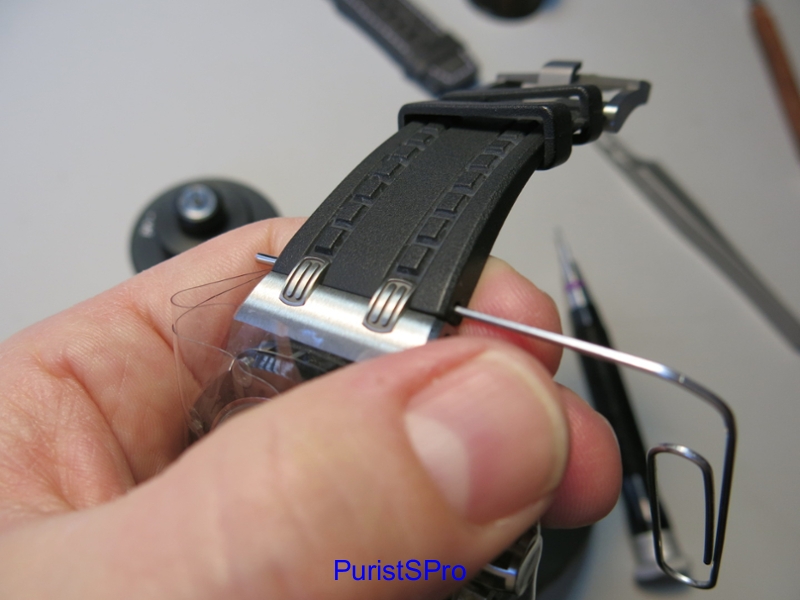
Take a look at the details on the AP plots. If you want to know how AP gets the straps to fit so wonderfully tight to the case, it is with this structural design.

Halfway home…
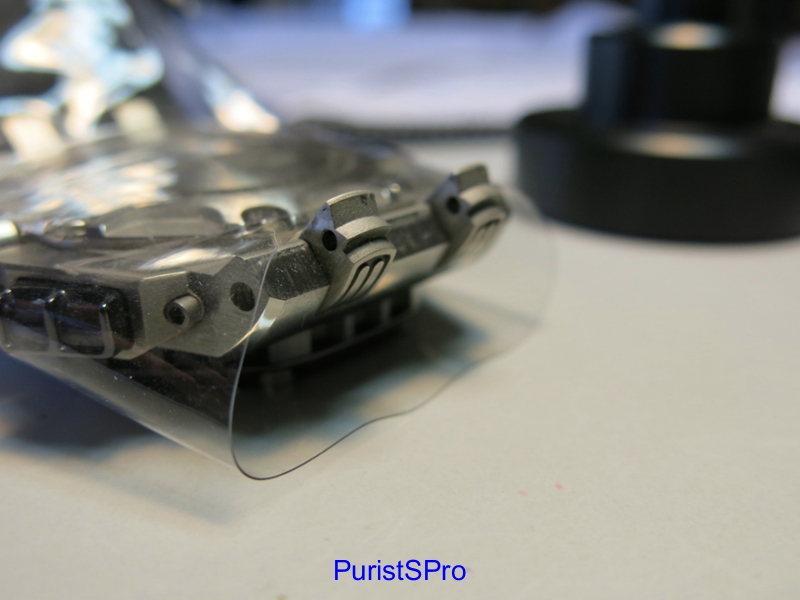
Here you see the metal structure inside the strap itself. Those notches interlock with the plots to make that secure connection.
These straps typically fit so tight that you can push it on the plots and it stays in place on its own. Here you see daylight where we need to attach the 2 part screw.
Again, I feed the long part through the bottom and then set the small screw piece on top. Same procedure as before, make sure those screwdriver blades are properly seated and use strong pressure.
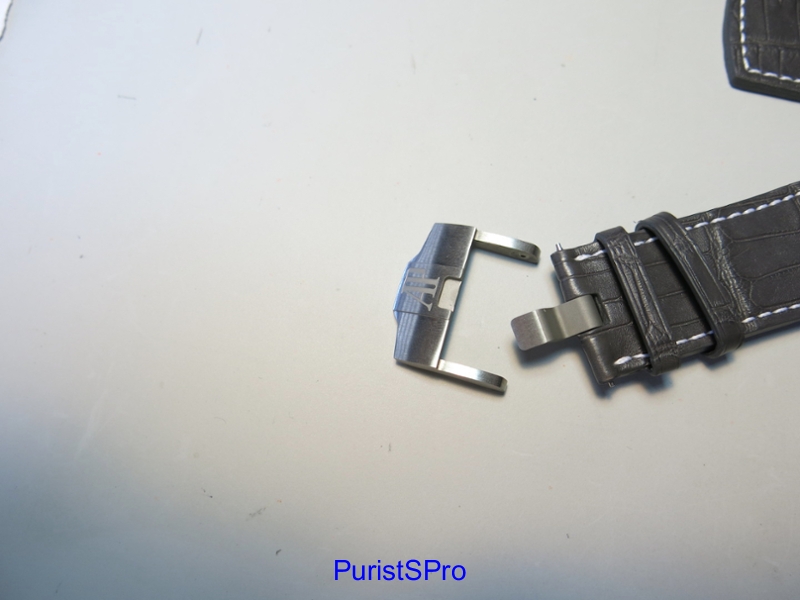
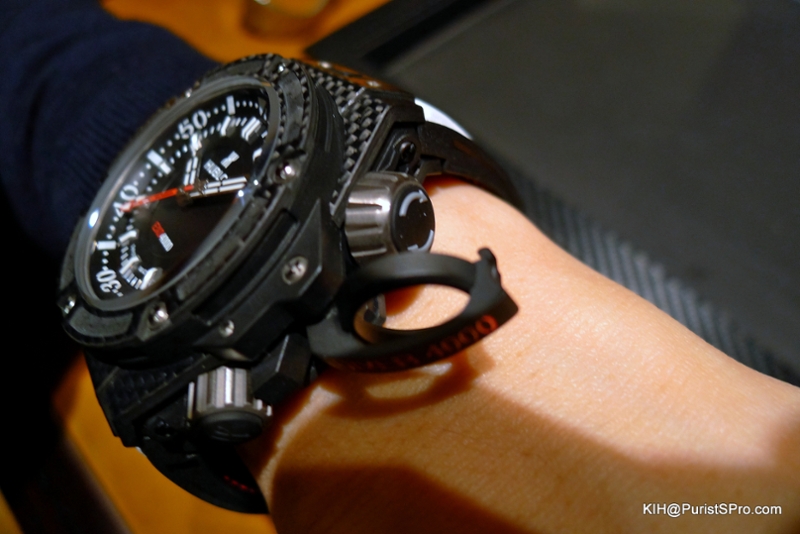
The first look…
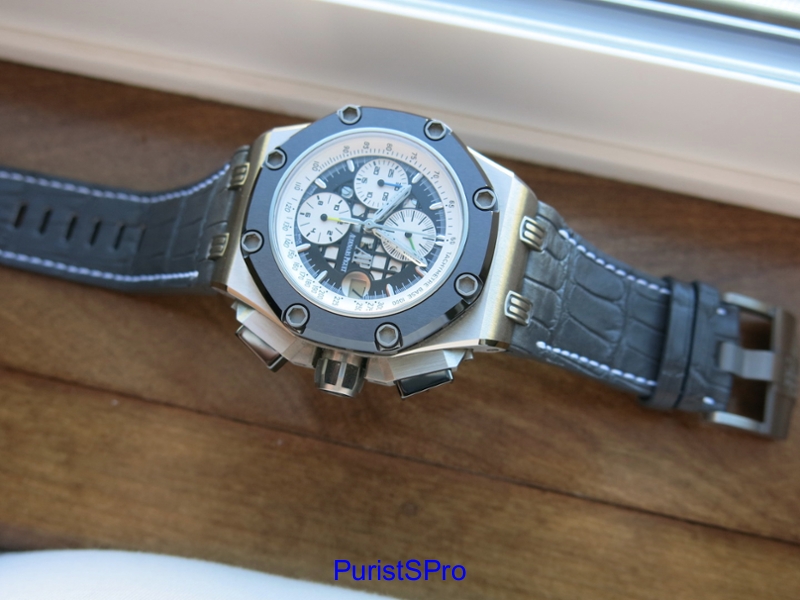
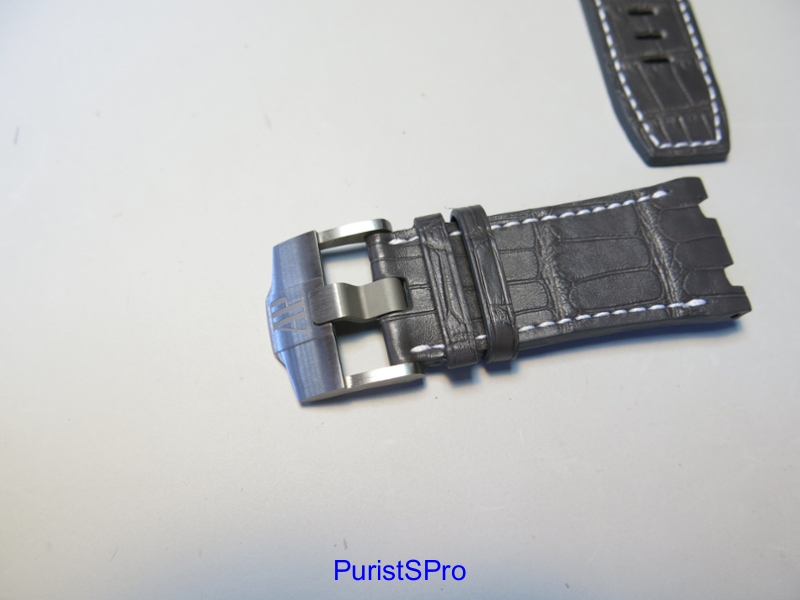
Regardless of which strap you like on the RBII, it HAS to have this brushed ti buckle.
I think the result is terrific. The white stitching really adds a lot to the look. I am not used to seeing that having used the black rubber Survivor strap since I acquired the watch.

So there you have it, changing straps on a Royal Oak Offshore. It can make your heart race a little the first few times, but if you have steady hands and decent eyesight it is not difficult. But remember, your friendly AP Boutique can always help out too. If I were not thousands of miles away to my local AP Boutique, I might go that route myself
This message has been edited by MichaelC on 2015-03-07 10:39:09 I have to say that any strap looks terrific on RB2. This is my favorite AP and I onlywish that this model was not a limited edition. One of the items I appreciate the mostare the screws on the bezels, they’re fantastic and would like to see these adoptedto all OffShore watches.
Jeff